Tuesday 21 February 2017

Joining a Quilt Binding - My "No Math" Method


I enjoyed a lovely day this week with my friends at the ALBERTA QUILT STUDY SOCIETY.  We got together to make quilts for CANADA'S BIG QUILT BEE.  

While one of the ladies was putting a binding on a quilt the conversation started about how everyone joins their bindings together while sewing them onto a quilt.  This led to me doing a demo on my 3-PIN BINDING JOIN.  It's the easiest method ever, requiring no math, with perfect results everytime.

I am re-posting the original version here as a lot of you followers were not with me at that time.


You are gonna love this! 


http://quiltersenjoycolor.blogspot.ca/2014/02/how-to-join-quilt-binding-my-3-pin.html


Here are some photos of quilt tops that we made at our Quilting Bee.  


Links: 

Canada's Big Quilt Bee
https://www.canadianquilter.com/events/quilt-canada-2017-quilting-bee.php  


AQSS     
http://www.abqss.com/index.html

Tuesday 14 February 2017

Canadian Heart - Part 2 - Putting It Altogether


Begin this quilt by making 16 IMPROVISE HEART BLOCKS

For Part 1 - Layout and Cutting CLICK HERE 


Now to sew it together...


The layout. 


When you are working with a diagonal setting you will 
sew your quilt top together in the diagonal rows. 


Work on half of your quilt at a time. 


 Sew the middle seam together last.  


Notice the room around the edges for border or binding because of the larger setting triangles.  This is a good method for a modern quilt when you want to bind this edge. 


 Happy 150th Canada!


 The completed quilt top is 50" x 82". 


Trouble Shooting 

I ran into this little snag when piecing my quilt together.  I was just going along, minding my own business, when I spotted inconvenient dog ears!  Oh dang.

I needed to do a bit of un-sewing to be able to put my sashing rows on properly.   

Of course, not sewing these points down to begin with is the best alternative :)
But, if you are like me and stuff happens, here is the solution.

In the top-centre of the photo below notice how the top left point of the triangle is in the way for the sashing row to be sewn on.

 Close-up

Undo this point about 1", sew your sashing in place, then sew this point back down.  


Begin this quilt by making 16 IMPROVISE HEART BLOCKS

For Part 1 - Layout and Cutting CLICK HERE 


Monday 13 February 2017

Canadian Heart - Part 1 - Layout & Cutting


I love you Canada.  
You are truly beautiful.  

Happy 150th Birthday 2017
and
Happy Valentine's Day!


To begin make 16 IMPROVISE HEART BLOCKS as directed HERE

The WARM COLOUR COMBINATIONS of Red, Pink, and Purple 
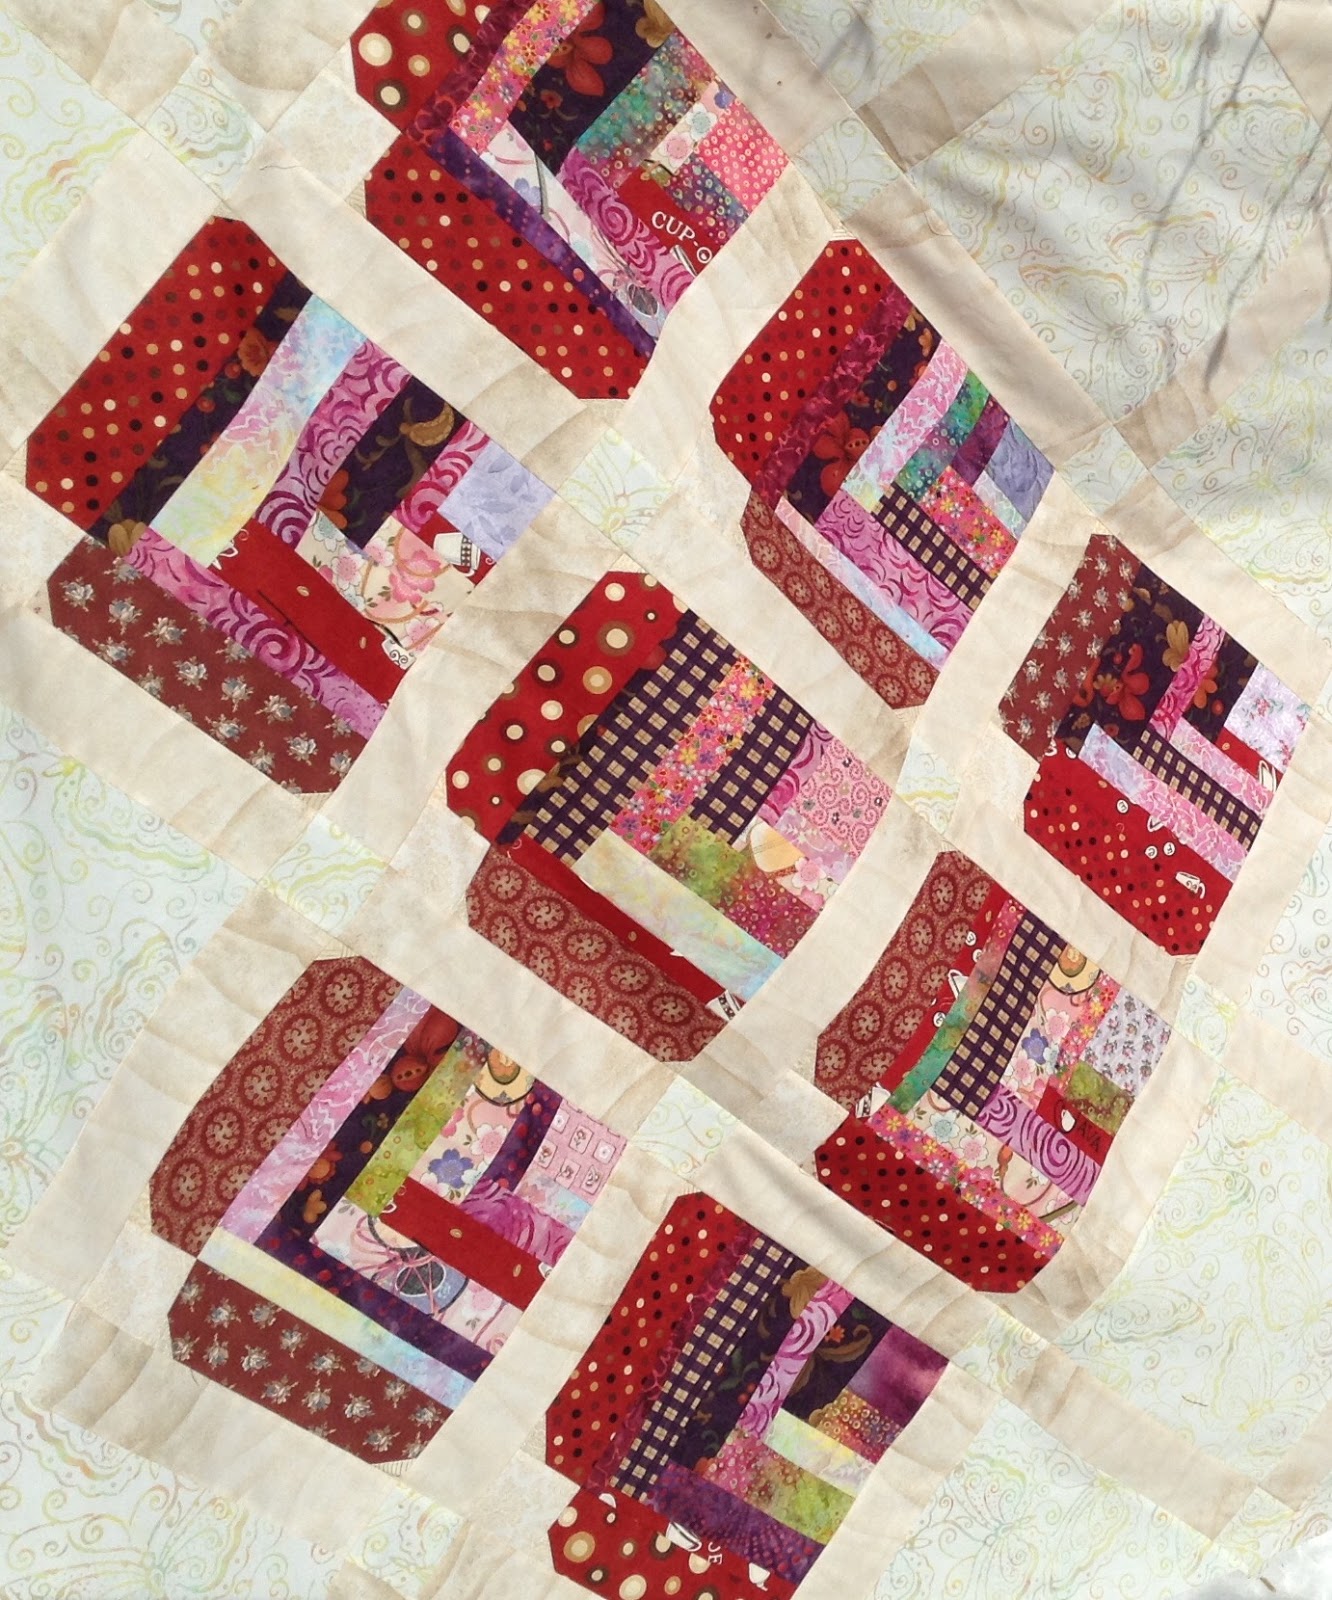
make beautiful heart blocks.  


After much contemplation I decided to go with this layout.  I love how the heart blocks come together to create a beautiful heart shape at each end of the quilt and together make large "butterfly wings". 


I have been admiring the low volume (tone on tone) look in quilts.  I chose two cream coloured fabrics for the setting blocks, sashing, and corner stones.  These background colours allow the heart blocks to be featured.

In the photo below you will notice the beautiful butterfly batik which adds to the quilt's theme. 


In the next photo you will see the generous size of my setting triangles.  I always cut them a bit larger than necessary so that I have room to make nice points when I add my border or binding. 


Me and fabric - I only ever buy 2 metre (2 yard) cuts or more.   When I make a quilt I go to my stash, pull colours together, and start cutting.  So as far as fabric requirements go,  I'm not very helpful in this area.  Sorry :(

You will require:
A.  Sashing Fabric.

B.  Background Fabric (this will be used for background and cornerstones).


Cutting Directions for the setting of the Canadian Valentine Quilt:

In addition to your 16 -  Improvise Heart Blocks (10" blocks) you will require the following:  


Sashing:
Cut 14 - 2 1/2" WOF (width of fabric) strips of Sashing Fabric A.  
Subcut into 56 Strips:  10" X 2 1/2" 

Corner Sashing:
Cut 2 - 2 1/2" WOF strips of Sashing Fabric A.
Subcut into 4 Strips:  12" X 2 1/2" 

Setting Blocks:
Cut 2 - 10" WOF strips of Background Fabric B.  
Subcut into 6 - 10" Blocks. 

Setting Triangles:
Cut 4 - 16" Squares of Background Fabric B.  
Subcut each square twice on the diagonal to make 16 Setting Triangles.  

Cornerstones:
Cut 3 -  2 1/2" WOF strips of Background Fabric B.
Subcut into 35 - 2 1/2" squares. 
Optional: Fussy-cut one Maple Leaf block to use as a cornerstone feature. 

For more information on measuring and cutting setting triangles please see this excellent LINK at "Generations Quilt Patterns"