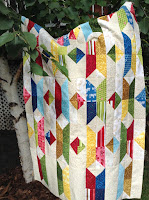
Tuesday 16 August 2016

Split Triangle Row Quilt (Step 1)


Materials:
2 brightly colored Charm Packs or equivalent fabric cut into 5" squares.
2 neutral colored Charm Packs or equivalent fabric cut into 5" squares.


Using this tutorial, Making Half Square Triangles (Even If You Know How), make 48 HST blocks (4 1/2") for a small baby quilt or 96 HST blocks (4 1/2") for a lap quilt.  Each block will require one light and one dark 5" Charm Square.

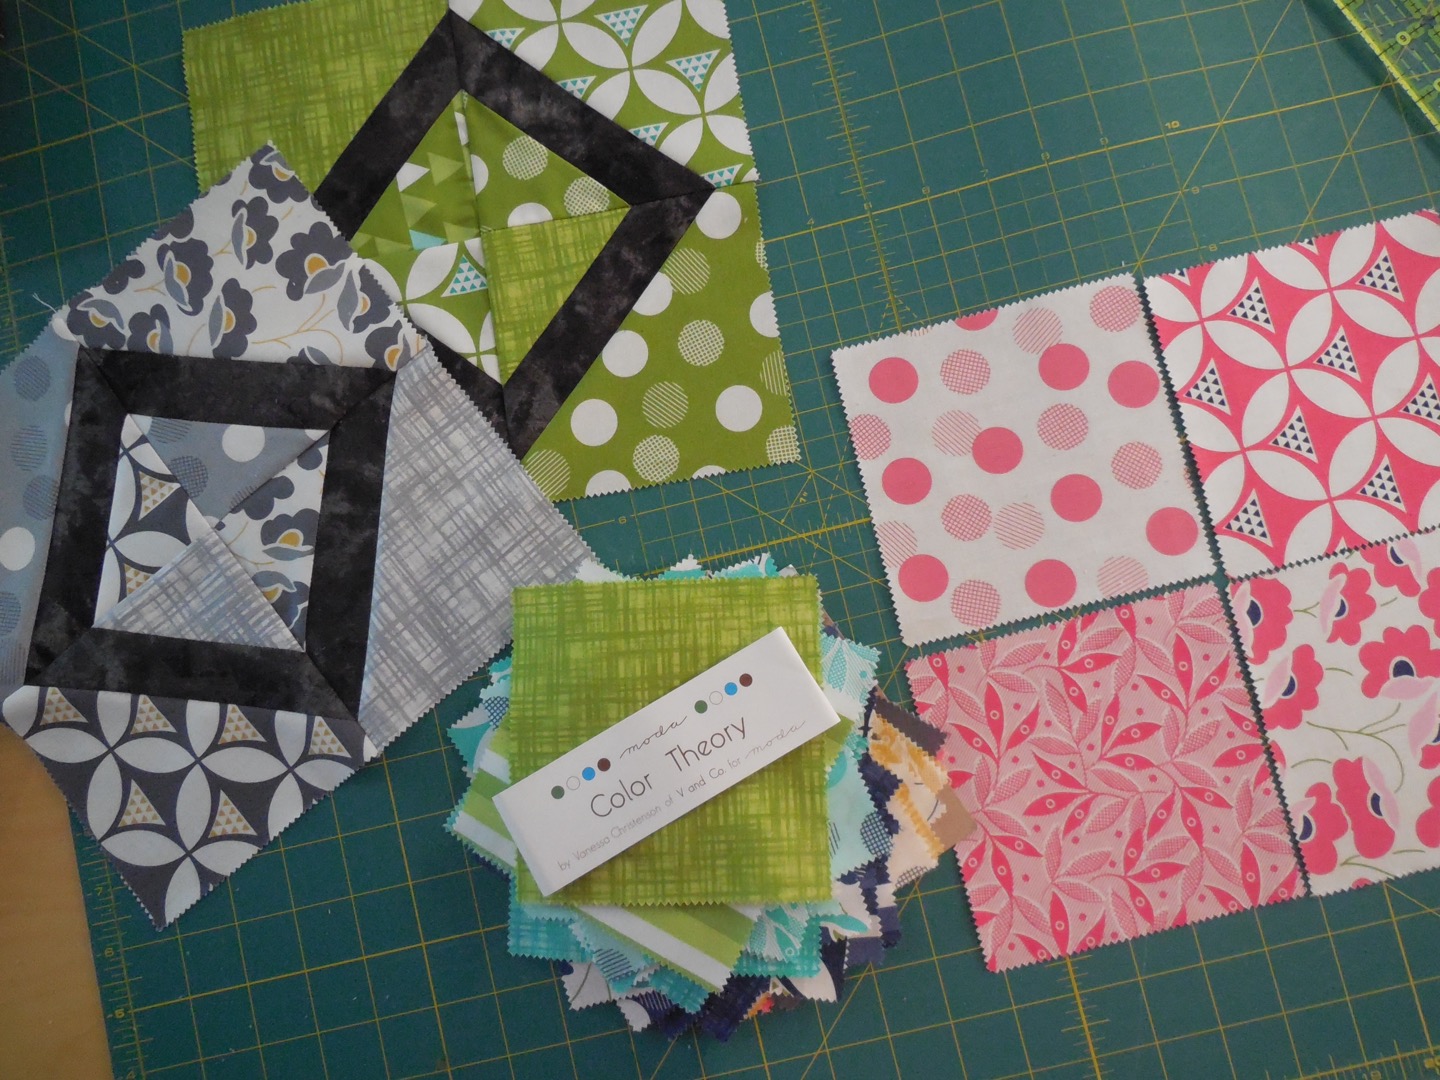
 Organize your HSTs into sets of pairs with 
coordinating colors facing each other.  

Chain piece the pairs, remembering to keep the colored sides together.  

Press.  


 Organizing your blocks as you desire, 
sew 3 of the sets together to make a row. 

Press.


Now, here is the fun part!
 Line your rows vertically on your cutting mat 
and cut them in half lengthwise.  
 Each half will be 2 1/4" wide.
 Rearrange your strips like this.  

 Or mix up the colors like this.  


Play around with the strips to create these pattern options. 


This content is provided free to you with lovely sponsorship and affiliate ads.  

 Please kindly take a peek at the sidebar for quilty and knitty connections.   


Please find Step 2 here.


Wednesday 10 August 2016

Making Half Square Triangles (Even If You Know How)


One of the classes that I was most interested in when I became a seamstress was Professional Efficiency.  I have used many of the skills that I learned and am always interested in new efficient methods.  This is my latest favorite!  

I am designing a new project that requires many Half Square Triangles (HSTs).  While I am working on them I will show you this awesome method.  I am making HSTs out of a Charm Pack (5" Squares). The finished HST blocks will be 4 1/2".   From one pair of charm squares you will make 2 HSTs with no waste.  This process allows you to sew HSTs without drawing lines through the center of your squares from point to point. 
 
Place a ruler under your presser foot with the needle placed at the 1/4" mark.   Drop the presser foot to keep the ruler tight.  Line it up nice and straight.
             
Using Painter's Tape put a strip along the edge of the ruler, front and back of the presser foot.   
Place a pair of Charm Squares right-sides-together.  In this project I am using one light and one dark square.  Sew your seam keeping the point of the square lined up along the edge of the painters tape.  Start by lining up the point to the edge of the tape behind the presser foot.  The above photo is a view from the back of the sewing machine as the point goes along the edge of the tape.


+AP16


As you work your way along the seam, now line the front point of the square along the edge of the painters tape.  This assures that your seam is 1/4" from the center of the square. 


 Chain piece your HST blocks. 

 
 Use the same process to sew the seam on the other side of center. 

+AP16


 Cut the 2 halves apart using your rotary cutter. 


 Here is a nice pile of HST blocks in a flash!
Press and trim to 4 1/2" to your desired level of perfection.
 
+AP16


Check out this pattern that began with HSTs!
Split Triangle Rows 
 

Tuesday 2 August 2016

Pink Diamond Quilt Block


I bought a beautiful charm pack by Moda called Color Theory that worked well for this block.  One charm pack will produce 10 Pink Diamond blocks.


For each 9 1/2" block you will need:

4 charm squares (5"squares)
&
1 WOF strip x 1 1/2" wide of a neutral color.
&
6 X 24" ruler with marked angles.
 

Each block will use 26" of the 1 1/2" strip.  Keep this in mind when making multiple blocks as you will not need to cut a full WOF strip for each block.   


Place the intersecting 45 degree lines of your ruler at the bottom left corner of each charm square and cut along the ruler edge.  This one cut results in the 2 pieces that will be used for your block. 


Notice that the 45 degree intersecting lines are marked with a circle on this Omnigrid ruler. This 45 degree mark is placed on the bottom left hand corner of your charm square (5" square) for cutting.


The resulting pieces.  
Alternate the colors for an interesting block. 


Using a 1/4" seam sew the large cut pieces to the neutral 1 1/2" strip as in the above photo.  Press open using your desired method.  

Alternating your fabric colors, center the small triangle on the right side of your strip by lining up the points of the triangles across from each other.  Sew using a 1/4" seam allowance. 

 Press open.  Your 4 pieces now look like this. 


Trim to 5" square.  

You will trim the small triangle corner of your sewn piece.  The larger corner will not require trimming. In this photo you will notice the original pinked edges of the charm square on the large side. 


Place your 4 squares together and sew into your 9 1/2" block. 


Sponsors and affiliate links keep the content of this blog free to all.  
Please check out the quilty connections in the right side bar.   
Thank you for checking in, Melanie