Friday 2 October 2020

Melanie's Temperature Quilt - Step by Step Easy Improv


Printer-friendly PDF of this pattern available here:


We Canadians talk about the weather.  Everyday.  Every conversation.  A lot of what we do is affected by it.  How we dress.  Where we go.  When we go. 

It is consistent that the weather changes.  It's gentle and extreme.  It's beautiful and harsh.   It shows up in the colours of warm and cold.   In the Alberta foothills we enjoy the Chinooks and the mark they make on the sky as they appear as a gorgeous arch.

When I saw my first temperature quilt, I thought how interesting it would be to make one.  I love the opposing colours of the climate in fabric and the way they appear in visual pattern.  

I am doing a simple improv method for this quilt that I share with you in this post.   For each day it represents the high and low temperatures against the sky.  I chose to add the sky component for added weather documentation.  

This content is provided free to you with lovely sponsorship and affiliate ads.  Please kindly take a peek at the sidebar for quilty connections.    


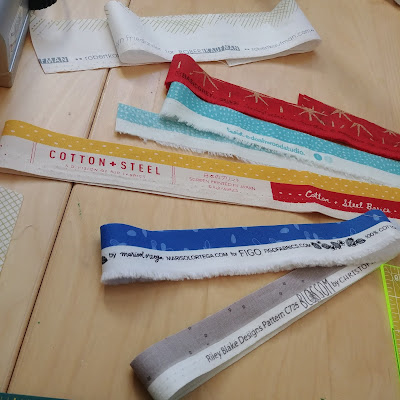
 Fabrics provided by


Materials: 

1.5m of each colour of fabric for your temperature blocks and sky. 

Step 1:  

Select your fabric.  Each fabric in my quilt represents 10 degrees in Celsius.  The colours for the sky represent sunny, cloudy, and mixed sky days.   For more on the colour palette please see this post:  Temperature Quilt / September 2020 - August 2021


Step 2:  

Remove selvage edges for future reference.  


Step 3:  

Cut WOF (width of fabric) strips 3" wide.  To begin you will only need 1 strip of each colour.  You can cut these throughout the year as required.  


Step 4:  CUTTING:

Cut a 5" x 3" strip of your High Temperature colour for the day.  

Cut a 4" x 3" strip of your Low Temperature colour for the day.  

Cut a 5 1/2" x 3" strip of your Sky Colour for the day.  


Step 5:

Using a 1/4" seam allowance, sew the High and Low temperature strips together, keeping the High Temperature strip on the left side.  This layout is important so that your angle is consistent for all of your blocks.

 Fabrics provided by


Printer-friendly PDF of this pattern available here:
PDF Download on Etsy

Step 6:

Place the sky fabric above the Temperature Strips. 

 Please note: at the time that I did this photography 

I had cut the sky fabric wider than the 3" that is required.  

Step 7:

Overlap the temperature fabric strips onto the sky strip as in the photo above.  Be sure to leave enough of the sky fabric under the temperature fabrics to accommodate the angle that you will cut next. 

Step 8:  

Cut the Improv Angle for your block.  Any angle is fine and this can change from block to block.   Watch that your angle goes thru the 2 layers of fabric from edge to edge.  Remove the excess bits of fabric that you have cut off of the 2 layers. 

Please see more options for cutting the sky fabrics on this post:

Melanie's Temperature Quilt - Organizing & Tips

Step 9:

Right sides together, sew the Sky fabric to the Temp fabrics using a 1/4" seam allowance. 


Step 10:

Press the seam in the way that you prefer.  I like to press towards the sky fabric.  

Step 11:

Trim your block to 5" square.   

Using painters tape on your ruler to mark the 5" square is quite helpful. 


Printer-friendly PDF of this pattern available here:
PDF Download on Etsy
 

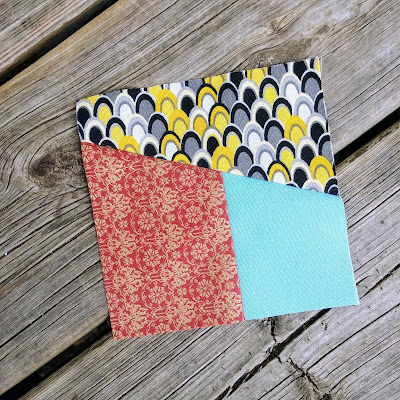
Step 12: A beautiful temperature block. 

This particular block represents:

Day 1: September 1, 2020 
High:  26 C 
Low:  5 C 
Sky:  A mix of Cloud and Sun 


In the photo above, machine embroidery has been used 
to document some personal dates on these blocks.

 Fabrics provided by

 Hi! I'm Lily


More to come...please stayed tuned and thank you for reading, Melanie

This content is provided free to you with lovely sponsorship and affiliate ads.  

Please kindly take a peek at the sidebar for quilty connections.   

Friday 18 September 2020

No Curves! Drawstring Bag


Hello beginners!   
 
I am writing this project for you with a lot of detail and a few techniques for learning.   
Of course, anyone can sew this cute little bag for a quick and easy project. 
#nocurvesdrawstringbag
 
Materials:  
 
1 Fat Quarter (this will measure approx 18 x 21" to 20 x 21".   Either size will work well.  
 
5" of coordinating fabric x WOF (width of fabric).  WOF is normally about 42".  

Coordinating thread and a full bobbin.  

Sewing machine and basic sewing supplies.  

Iron and ironing board. 

A standard ruler and rotary cutter such as a 3" x 18" ruler or a 6" x 12" ruler.  

Sewing scissors.


DRAWSTRING BAG BODY

Step 1.
 
Iron your fat quarter so it is nice and flat.  


Step 2. 
 
Using your ruler and rotary cutter, cut off each corner of your fat quarter leaving a 3" diagonal edge.  (2 photos below)


Step 3.

Using your iron, turn under each diagonal edge approx 1/4" and iron the fold.   Turn under a second time and iron again.  

Sew these edges using a 2 - 2.5mm stitch, keeping your stitches as close the edge of the hem as possible.  Reverse the stitches at each end to secure the hem. (photo below)


Step 4.

On each of the 4 sides, turn under 1 1/2" and iron this fold in place. (2 pictures below)


Step 5. 

Open the fabric up so you can see the fold line that you just ironed in place.  


Step 6.

Turn under the very edge about 1/4" and iron it in place, being careful not to 

iron over the 1 1/2" fold line. (photo below)


Step 7.

Fold again on the original 1 1/2" line, press, then sew the hem in place, leaving the open mitered corner for your drawstring. Reverse the stitches at each end to secure the stitching. (photo below)

If the miters don't turn out perfectly even (photo below), this is absolutely fine.  You are inserting a drawstring thru the hem and will not see the imperfection.  


DRAWSTRING:

Step 1. 

Cut 2 WOF (width of fabric) strips 2" wide each.  You can use a rotary cutter and ruler or a pair of scissors to cut the fabric. 


Step 2.

With right sides together and folded in half lengthwise, sew the raw edges of the long sides of the strip together using a 1/4" seam,  reversing at each end to lock in the stitches. You have created an inside-out tube. (photo below)


Step 3.

Attach a safety pin to the edge of the tube at one end. 

Step 4.

Stick the safety pin into the opening of the tube.

Step 5.

Feed the safety pin thru the tube to turn it right-side out. 

Step 6.

Press it nice and flat, working the seam to the edge as you press.  (photo below)


Step 7.

Repeat this process for the second strip, so you will have 2 drawstrings. 


Step 8.

With a safety pin attached to one end of each drawstring, insert thru the mitered hems as in the diagram below.  


Step 9.

After the drawstrings are each thru 3 sides, tie the ends together with small knots.  


Step 10.

Pull at each knot to close your cute little bag.


You did it! 

Congratulations on your gorgeous accomplishment!  


 Thanks for checking in and sewing with me, Melanie 

#nocurvesdrawstringbag


Affiliate ads and sponsors allow me to keep this content free. 

Wednesday 2 September 2020

Temperature Quilt / September 2020 - August 2021


September always feels like a new year to me and with the MQG announcing a Special Exhibit of Temperature Quilts at QuiltCon 2022 in Phoenix, this is a fantastic time to start my very own.

I love fall weather and it's a very inspiring time to start a Temperature Quilt here in Canada. The days are sociable. The nights are cool for sleeping. The skies show a picture of pretty clouds and the colours of blue. 

The warm, cold, colder, and coldest fluctuations during the course of a year in Canada are extreme. This is going to create a fantastic colour story on the quilt top. 

Weather in Calgary always involves a look at the Sky, so I am adding this element to my Temperature Quilt.


It started with a sketch.  

My plan is to Improv these blocks.  They will measure 5" cut.  The angle of the sky portion is important to the improv so that not too many seams have to line up when piecing the finished blocks together. 


Sponsored by

 Then a decision about what colours felt warm and cold (and colder and coldest!).  
Yes, that -30C and lower is a real thing people! Eeek.
Not really looking forward to that part of the year.


 Putting the written palette to fabrics.  

Sponsored by

 September 1 - Block 1 of 365.  5" Square. 

Day 1: September 1, 2020 
High:  26 C 
Low:  5 C 
Sky:  A mix of Cloud and Sun
 
 If you would like to use my design for your own Temperature Quilt 
please hashtag #melaniestemperaturequilt. 


Thank you for checking in, Melanie 

 Affiliate ads allow me to provide free content to you. 


Saturday 25 July 2020

Lightning Block - MQG Modern Monthly Issue 06

I am beyond excited to have my design, "The Lightning Block", selected as the Block Study for ISSUE 06 OF THE MQG MODERN MONTHLY

In this issue you are in for a wonderful surprise of beautiful patterns from the MQG.  Many talented designers have been included.  An annual membership will allow you full content to the MQG site and patterns.    


 Lightning Block designed by Melanie Rudy
Photography: Laura Loewen

 
 "Clamshell Quilt" designed by the MQG 
Block Design:  Melanie Rudy 
Made by:  Patricia Heath
Photography:  Laura Loewen

 
 "Lanterns Quilt" designed by the MQG
Block Design:  Melanie Rudy 
Made by:  Melissa Wong
Photography:  Laura Loewen