Wednesday 23 January 2013

Crazy Basket of Friendship Quilt Tutorial


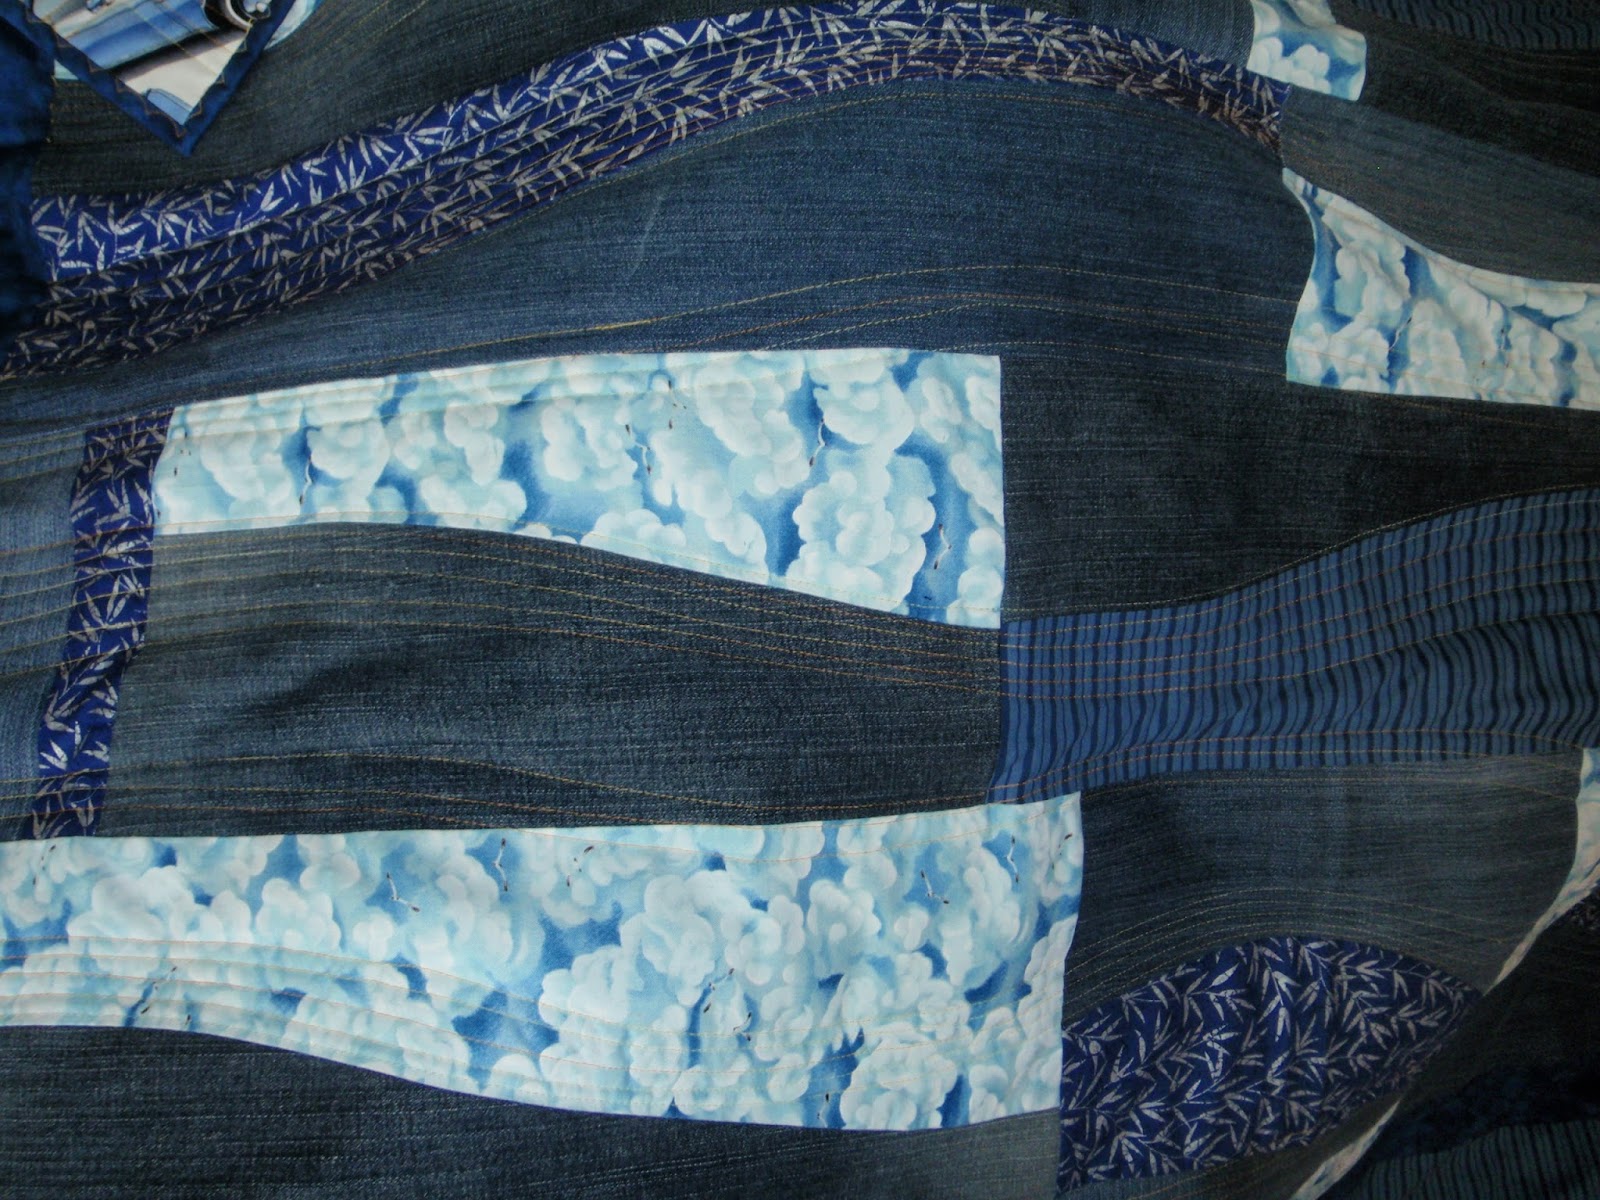
This quilt design was inspired by combining 
the two very traditional patterns of 
"Crazy Quilting" and "Rail Fence".  
It is done in a "cool" color scheme.

Custom Quilting by Lorraine Appleby. 


Here is the Crazy Quilting Method for you:


Tutorial for a 9" Crazy Basket Block:
(optional math for a 10 1/2" block is at the end of the page). 


Start by trimming your Crazy Blocks to 9" 
Cut them in half to produce two 4 1/2" x 9" rectangles.


Gathering 4 1/2" x 9" rectangles.


Next cut sashing rectangles 2 3/4" x 9" long.  You will need 2 for each of your Crazy Rectangles.


Sew the sashing rectangles to one side of the Crazy Rectangle, using a 1/4" seam. 


Run your seams together to save time and thread. 
Your bobbin thread will last a lot longer using this method. 


Now sew the sashing rectangle to the other side, again running the seams. 


Your blocks are now 9" x 9".   Trim to this size if necessary.  


Press to the "dark side".  

Lay your blocks out like this, to create a woven look. 
The bigger your quilt the more you will see the "weave". 


Here it is sewn together. 
The finished block sewn is 8 1/2". 
Please enjoy this pattern and thank you for checking in.   
This blog content is kept free for everyone via sponsorship and affiliate ads.  
Please peek at the side bar for lovely quilty content. 


Here is the math for a  10 1/2" block:

Cut the Crazy Rectangle 5 1/2 x 10 1/2"
Cut the Sashing 3 x 10 1/2 "

Trim to 10 1/2".
Sew to 10". 


2 more tutorials for you to try...


Friday 18 January 2013

3 & 8 Quilt Tutorial

This post updated February 26, 2023 for the Aunty & Annie Blog Re-Visit.


Please note:  Before sewing this quilt, it is very important that you have an accurate 1/4" seam allowance set on your machine.  


 "3 & 8 Quilt" 
made with 3" and 8" squares.


A friend gave me a big bag of 3" squares and I wanted to figure out what to do with them.  I divided the 3" squares into warm and cool colors, then combined the cool colored squares with this sports print from my stash.  My boys all play hockey in Canada and there is a question as to who this quilt will belong to!


Here is my design using
3" small squares and an 8" large square, with a 1/4" seam allowance.  


 3 - 3" squares sewn together and attached to one side of the 8" square. 
Turn this edge to the top of the block. 


4 - 3" squares sewn to the right side of the block.


 The finished block.   At this point it is 10 1/2".
When sewn into the quilt it will finish at 10". 
  
Here are a few layout options.


 This is what I will go with.


You will love this easy and accurate binding join!  


Sunday 13 January 2013

Finding Fabric Repeats Tutorial - an Easy Way


There are many interesting quilt patterns that require the use of  "Fabric Repeats".  This allows you to have numerous pieces of the exact pattern of the fabric.  


Here are the steps for a very EASY method to find your fabric repeats:


 1.  At the top edge of your fabric rip off approx 2" of fabric.  This will get your fabric on grain, as well as finding the edge of your first pattern repeat. 

 This ripped off piece will not remain uniform in size. 


2.   Now take the ripped off piece of fabric and slide it down your main piece of fabric, looking at the vertical edge.  Move the ripped piece down until you find the same pattern on the vertical edge.  
On the very right hand side of this photo, about halfway down, you will see the ripped off piece where the vertical edges are matching.  Look closely and you will see the horizontal ripped edge lined up on the exact repeat of the main fabric all the way across

 
 Here is a close-up detail of the vertical edge,
with the ripped piece on top.  


3.  Match up your fabric repeat by lining up the horizontal ripped line with the horizontal repeat on the large piece of fabric.  It's so easy and the repeat is perfectly placed. 


4. Snip and rip your main fabric where the ripped line matched up.   Rip your fabric section off of the main piece.  You want to rip (not cut) for fabric repeats to achieve the most accurate pieces of fabric possible.  Repeat this process for as many repeats as your pattern requires. 


  Detail photos.