Wednesday, 30 December 2015

FaveQuilts Top Blogger 2015


I am pleased to announce that I was again named a 
Top Blogger for the year as a designer for FaveQuilts!   


Please enjoy their Top 100 Quilt patterns for 2015 here!


Included in this list are these 2 of my patterns:


 Check out the incredible custom quilting 
by Lorraine Appleby, Calgary, Canada.


Happy New Year 
to you all!  

Thursday, 24 December 2015

Season's Greetings 2015

Thank you all for reading my blog. 
Please enjoy my Christmas Story for 2015.  


The Budget

The budget was $20.   What would we get this year?  Every year it was a surprise.  By the time I was ten I looked forward to this special day.  It was 1975. 

Mom would have supper ready by 5pm.  We always ate early and in mid December the sun would set by the time our meal was done.   I remember a delicious chicken dinner made by my mom who was raised on the farm.  She cooked for her now family of 6 just like the family of 13 that she cooked for as she was growing up.  Potatoes, corn, and 2 jars from the cold storage, dill pickles and crabapple jelly, accompanied the chicken that came from my Uncle’s farm.   Our food was wholesome and organic.  The type of food people pay money for at gourmet shops now was the staple of my childhood.

Mom and I would hand wash the dishes while my 3 brothers were in the back entrance getting ready for their evening at “Alexander”, the outdoor rink nearby.  They would dress warm, tie their skates together by the laces and throw them over a shoulder.  Hockey stick in hand, they were off to play shinny.  It was about a 15-minute walk to the rink.  The snow sparkled and the nights were cold, but they didn’t seem to notice either of these things.  There was a heated shack at the rink to warm up in.  If it was very cold they could put their skates on in there too.  They would shinny under the lights until 8:30pm when the curfew siren rang.  Everyone knew this was the time to go home.  It was a simple method, understood by all the kids of the small city of North Battleford. 

Dishes done and boys out of the house, it was time for the annual event that I looked forward to.  My dad and me were going to buy the Christmas tree.   The car would be warm by the time we left.  He must have warmed it up while mom and I did the dishes. 

We would take a light tour of the city, which was amazing in 1975.  Not just because I was small, but it was a time when neighbourhoods got together to make the Christmas season special for everyone.  On the east side of the city there were a few streets that had themes.   The one I remember well was “Candy Cane Lane”.  At the end of each driveway every home on the street had a big candy cane made of wood and wrapped with lights.  It was quite a lovely sight from the end of the street thru the eyes of a 10-year-old girl.  The candy canes were lined up in precision down both sides of the street and they glowed with the big bright outdoor Christmas bulbs of the 1970s.  Dad and I would drive up and down the lane, maybe 2 or 3 times, quietly enjoying the moment while the snowy streets crunched under the car tires.  It was so exciting and beautiful!   Next, we drove past Ann Shiplett’s house.  She was an incredible artist who carved a complete life size nativity scene out of ice.   The ice would start out in huge blocks and the nativity would emerge by the night my dad and I were ready to go shopping for our Christmas tree. 

The tree lot was not far from the grocery store on 104th Street where you could buy Ukrainian sausage. Focused on our evergreen, we didn’t stop for sausage that night.  The beautiful Ukrainian church was just across the street from the Christmas trees. The trees were frozen solid, packed up tight, tied with twine and surrounded by the blessings of this lovely street.  We knew the 8-foot height of the tree we were buying, but the shape would be determined after the thaw. The man attending the lot would ask how much we wanted to spend.  This was not personal.  It was a question people were always asked before the days of credit cards.  The budget was $20. 

For $20 we could get a beauty.  It would have been frozen freshly cut.  The smell of the tree lot was aromatic and memorable.  We would try to make sure the tree was full on all sides.  We would flip a few of them around, trying to compare the fullness in those tightly tied up trees. 

We would pay our $20 cash and take the tree home.  Packing the tree was dad’s job.  I don’t remember that part.  When we got it home he would take it to the backyard and use a handsaw to trim the bottom on a bit of an angle so the water could be absorbed properly.  We had a big pail with gravel that held the tree up and was heavy enough that the cat would not tip it over.   The real surprise emerged the next morning when the tree would have spread and settled into its shape for Christmas.  By the time I went to bed the odd branch would be settling downward, beginning to take it’s form.  In the morning the tree was open, but would still be frosty. 

It would be this evening that we would put the lights on and decorate. Our whole family would enjoy this special night of blinkers, bright lights, glass ornaments, and tinsel.  Lots and lots of silver tinsel. 


Saturday, 31 October 2015

Denim Triangle Bag with Lining


  Isn't this just the cutest bag?   
I love the recycled denim incorporating the pockets.


+AP16
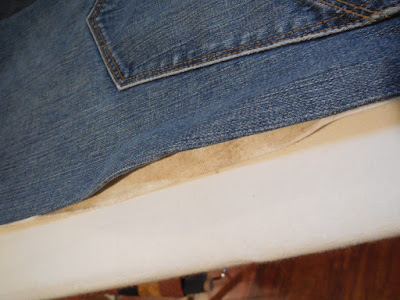
Start by breaking your jeans down into full lengths.  Trim off the waistband and hem.  Trim off the thick seams. This bag can be made with 1 pair of jeans, but I have used 2 pairs to have variety in color.  You will require 2 pant legs with the back pockets and a bit of extra denim from the front of the pants. 


Square up the pant legs to have long rectangle pieces of denim.  Mine were 10" x 35" each.  Sew 2 legs together, alternating the pockets.  It is important to have a pocket at each end.  Add 2 extra strips of denim (one to the top and one to the bottom of your pant legs) to make a length of 47".  


The final dimensions of the denim panel are 19 1/2" x 47"
with a pocket at each end. 


+AP16

Trim your denim panel to 19" x 44". 

Cut a piece of lining fabric 19" x 44". 


Pin the lining to the denim panel and stitch together all the way around using a 5/8" seam allowance leaving an opening for turning.  Keep the opening towards one end near the pocket.  

Tip: Mark using 2 pins at each end of your opening to easily see as you sew. 


Trim corners and turn right-side-out. 

Press the edges all the way around the panel and press the opening edges under.  It is not necessary to sew this together as it will get caught in a seam of the bag. 


Pin mark 15" from each end on THE POCKET SIDE.
This will be the fold line for your seam. 


Fold your panel right-sides together and sew 
ON THE POCKET SIDE ONLY
with a 1/4" seam allowance.  

Note:  You are only sewing on one side of the panel
where the pocket is. 


Now turn up 15" at the other end of the panel.   Sew right-sides-together with a 1/4" seam allowance ON THE POCKET SIDE ONLY.  This side is a bit awkward to sew as your triangle bag develops. 


Turn your bag right-sides-out and you have an awesome bag!
Isn't it fun? 


I'm getting ahead of myself :)  There is one more step...

Lap the top corners of the bag over each other 
and sew together with a small square of stitching. 


+AP16


Please enjoy this and many other projects on my blog.  

This content is provided free to you with lovely sponsorship and affiliate ads.  

Please kindly take a peek at the sidebar for quilty connections.    
 
Please click here for a lightweight and smaller version, 
http://quiltersenjoycolor.blogspot.com/2019/10/triangle-project-bag.html 


http://quiltersenjoycolor.blogspot.com/2019/10/triangle-project-bag.html


Please see the right side bar 
at the top of this page 
for my most popular posts.  


Tuesday, 20 October 2015

The "Wildflower Improvise" is Complete!


I love this quilt and am so pleased to have it finished!   I have had an amazing and busy summer and fall enjoying the outdoors and traveling in Canada and Europe.  I decided to spend this year saying "yes" to as many adventures as possible.   This included bike rides in Calgary, Kelowna, Germany, and Austria!  It has been wonderful these past few weeks to re-group in my studio, looking forward to my next travel time. 

Now complete is the Wildflower Improvise Quilt.

These photos contains details of the Free Motion Quilting  that  I did throughout this quilt top.  In this project I focused on one design that I call the "Lollipop" as it compliments the floral theme of the Wildflower Block


 For this project I used a  Pieced Batting.

Here is an edge detail with a binding join that I have developed called My 3 Pin Binding Method.
This method creates a perfect and accurate join everytime!


I hope you enjoy these techniques and are having a wonderful autumn season,
                                                                                                                      Melanie


Wednesday, 19 August 2015

Piecing Batting with a Wide Zig-Zag


 Often I have good pieces of quilt batting left and I like to piece them together to use in another project.  This is a quick and simple method that produces a good, strong join. 

Start with numerous pieces of the same type of batting.  
For this tutorial I had 4 pieces of various widths that were at least 70" long.  

My first step was to cut all of my batting pieces 70" long.  
This length for your batting will depend on the pieces that you have.  
They need to be cut to the same length, or added onto 
(using the method described here) to make the same length.


 Trim the edges of your batting pieces so they have a clean edge.  
The widths may vary from piece to piece,  just be sure that they are squared up.  


 Now, butt your pieces of batting edge to edge.  
Do not overlap.  
The batting is thick enough that it will sit nicely with the edges together. 
Pin at the beginning, middle, and end of the seam line to keep it even.  


 Keeping the edges pushed together, sew along the join line with a very wide zig-zag.  
The stitch here is 7mm wide.   

Here is a completed join.
 
When I go to pin my quilt I am able to use this as I would any brand new piece of batting.  

This piece is large enough for a lap quilt.  

I am going to use it for my  

 Happy Quilting Everyone!  

Tuesday, 11 August 2015


Modern Block Challenge - Block 1 - Voting August 11-14, 2015 

Hello Quilting Friends!   

I have entered the Modern Quilts Unlimited Block Challenge.  This challenge will take place over the next year, consisting of a block every month then a finished quilt at the end of the challenge.  Please vote for me monthly - I appreciate your support!


This is my first block, 
a modern variation on the Flying Geese Block
using Michael Miller Fabrics.  
"South, I Said South!"
 
PLEASE VOTE FOR ME HERE
from August 11-14, 2015
Thank you :) Melanie

Tuesday, 23 June 2015

Improvise Heart Block Tutorial

This post updated January 12, 2021


and working out from a small corner square, 
make as many blocks as you desire.  
For this color combination use red, pink, and purple scraps. 


 Trim to 8" square. 


 Cut rectangles 8 x 2 1/2" of red patterned fabric.  
You will require 2 rectangles for each of your blocks. 

Cut corner squares of cream colored fabric approx 2 x 2".  
This does not have to be accurate as you will see in the next photo.  

Sew the corners on at random diagonals as in the above photo.  
Looking closely you will see the stitching lines in the photo.   


Horizontal


 Press corners open and trim. 


 Cut cream colored 2 1/2" squares.  
You will require 1 for each of your blocks. 


 Assemble your improvised heart block.  
Sew together using a 1/4" seam allowance. 

The end result is a beautiful 10" block.  


Horizontal

Maybe I can have this quilt done for Valentine's Day!   

My unfinished projects are piling high - can anyone relate? 

If you love Heart Quilts as much as I do, 
check out my "Quilt - Hearts"
 page on Pinterest. 
http://quiltersenjoycolor.blogspot.ca/2017/02/canadian-heart-part-1-layout-cutting.html


Like to Improvise?