Leave long tails of at least 18" on both ends of your binding
to accommodate for the join.
to accommodate for the join.
Use a 2 1/2" binding, folded in half.
(Update February 2017: This also works for 2 1/4" bindings).
(Update February 2017: This also works for 2 1/4" bindings).
These photos show a machine sewn method that is attached from the back,
then folded over and machine topstitched to the front of the quilt.
then folded over and machine topstitched to the front of the quilt.
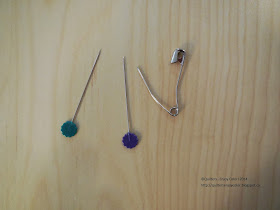
Supplies: 2 long straight pins and a safety pin.

Bring the ends of your bindings together, pulling taut (but not stretching),
folding them back where they meet. Center these folds along the 20" opening.
Holding taut, pin the left side of the binding to your quilt where it meets the right fold.
Pin thru one layer of the binding fabric as in the photo.
Fold the left side back.
Using this photo for reference, pin the right side of the binding to your quilt
where it meets the left fold that you have just pinned,
where it meets the left fold that you have just pinned,
The 2 pins should be next to each other, pinned to your quilt.
Fold the right side back.
Open the binding.
Insert the safety pin thru both layers of the binding fabric, 1/4" from the edge.
Close the safety pin.
This becomes your pivot point.
Remove the 2 straight pins.
Pivot the binding ends, perpendicular to each other, using the safety pin as your pivot point.
Make sure the fabric at the safety pin stays together.
The safety pin will now be on the seam line.
With the 2 straight pins, secure your bias seam line.
Sew the bias seam as in this photo,
removing the straight pins and safety pin as you sew.
Trim the ends of the seam and finger press open.
Pull the binding apart for a perfect fit
with a beautiful bias seam!
I am happy to share all information, images and tutorials from this blog,
with links and credit given to Quilters…Enjoy Color!
The contents on this blog are the property of Melanie Rudy at Quilters…Enjoy Color!
Email: quiltersenjoycolor@gmail.com
Tutorial: HOW TO APPLY QUILT BORDERS

I am happy to share all information, images and tutorials from this blog,
with links and credit given to Quilters…Enjoy Color!
The contents on this blog are the property of Melanie Rudy at Quilters…Enjoy Color!
Email: quiltersenjoycolor@gmail.com
Tutorial: HOW TO APPLY QUILT BORDERS


